This post contains affiliate links. If you make a purchase through links on our site, I may earn a small commission. Click to see full details of my Privacy Policy.
Learn how to crochet a relaxed open cardigan with this free step-by-step pattern by guest designer Emilia of Coffee and Crocheting. There’s nothing quite like wrapping yourself in a handmade crochet cardigan. Equal parts stylish and cosy, a crochet cardigan is the perfect layering piece for every season, whether you’re chasing a breezy summer evening, a crisp autumn walk, or just snuggling up at home with a cup of tea.


As this is a guest post, Bella Coco Crochet is unable to answer any queries. If you have a question, please contact the designer directly and they will be happy to help you.
Message From the Designer: Emilia
The Sunday Coffee Crochet Cardigan is a cosy cardigan that is perfect to wear at home or wear as a coatigan while strolling through the park. The cardigan is inspired by a cosy, cold Sunday afternoon. Snuggle up by the fire or in front of candles, sipping on a cup of coffee, relaxing. This cardigan is the perfect staple for your wardrobe, and both my pattern testers and I haven’t been able to take it off since making it. The feature of this design is the hidden pockets, as I like to call them. You’ll learn how to make them, which will be a great addition to your technique toolbox that you can add to any bottom-up pattern of your choice.
Materials & Tools
- Yarn: Aran weight yarn 1250 (1400, 1450, 1600, 1800, 1950, 2100, 2250, 2400) m / 1320 (1520, 1580, 1750, 1950, 2130, 2270, 2460, 2600) yards
- For the sample piece, I used Touch of Alpaca by Lion Brand. You could also use Stylecraft Special Aran or Paintbox Simply Aran to make this crochet cardigan.
- Hook: 5mm (H-8)
- Darning Needle
- Stitch Markers: 8-9

Pattern Notes
- Written in US terms.
- Made in 3 pieces: one body section and two sleeves. These are then seamed together, and a border is added.
- Turning chains do not count as stitches.
- Stitch count can be found in parentheses later in this guide.
- The cardigan in the pictures is in size S.
- Sizes 3XL-5XL are currently untested, however have been graded.
Gauge
- 11 esc across 10 rows of esc
- Gauge for sleeves: 15 hdc-blo across 10 rows
- Begin with the 5 mm (if you know from the beginning that you crochet tight, you can start with a larger hook) and chain 23. Make a esc in the third chain from the hook. Repeat across row. Chain 2. Turn. Continue with esc across row. Chain 2. Turn. Make rows of esc until your gauge swatch is 10 cm/4” and you are ready to check your gauge.
Sizing
- This pattern is written in nine sizes: XS (S, M, L, XL, 2XL, 3XL, 4XL, 5XL).
- Bust: 85 (95, 105, 115, 125, 135, 145, 155, 165) cm / 33.5 (37.4, 41.3, 45.3, 49.2, 53.1, 57.1, 61, 65)”
- Length: 70 (70, 70, 72, 75, 77, 77, 79, 79) cm / 27.6 (27.6, 27.6, 28.3, 29.5, 30.3, 30.3, 31.1, 31.1)”
- Sleeve circumference: 32 (34, 36, 40, 44, 46, 48, 50, 52) cm / 12.6 (13.4, 14.2, 15.7, 17.3, 18.1, 18.9, 19.7, 20.5)”
- Your own measurements of the bust should be 5 cm / 2” smaller. Positive ease.
- Yarn requirements for sizes: 1250 (1400, 1450, 1600, 1800, 1950, 2100, 2250, 2400) m / 1320 (1520, 1580, 1750, 1950, 2130, 2270, 2460, 2600) yards
Terms & Abbreviations
- Chain Stitch (ch): Insert hook, yarn over, pull though loop on the hook.
- Single Crochet (sc): Insert hook through stitch, yarn over, pull through chain stitch (2 loops on the hook), yarn over, pull through two loops on the hook
- Slip Stitch (sl st): Insert hook through stitch, yarn over, pull through chain and loop on the hook.
- yo: yarn over
- sm: stitch marker
- Half Double Crochet (hdc): Yarn over and insert your hook into the chain or stitch, yarn over and pull through (you will have three loops on the hook) yarn over and pull through all three loops on the hook
Special Stitches
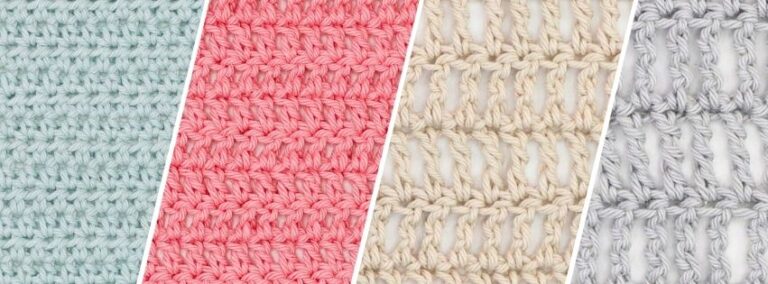
- Extended Single Crochet (esc): Insert hook in next st, yo, pull up a loop (2 loops on the hook), yo, pull through one of the loops on the hook, yo, pull through remaining loop on the hook.
- sl st blo: slip stitch back loop only
- hdc-blo: half double crochet back loop only
Unsure of the differences between UK and US terms? Need a refresher on how to do your stitches? In my ‘How to crochet: A handy reference guide’ EBook I help you with all of these terms and you can always have them to hand! You will also get exclusive access to free video instructions. Learn more about the eBook here.
Free Crochet Pattern: Sunday Coffee Crochet Cardigan
Body
- Ch 120 (131, 142, 153, 164, 172, 186, 197, 208)
- Row 1: esc in the 3rd stitch from the hook. Esc across row. Ch 2. Turn. 118 (129, 140, 151, 162, 170, 184, 195, 206) sts
- Row 2 – 20 (25 for sizes XL-5XL): esc across row. Ch 2. Turn. 118 (129, 140, 151, 162, 170, 184, 195, 206) sts Do not fasten off, continue with the pockets.
- Before row 21 (26 for sizes XL-5XL) you will add pockets to your cardigan.
How to Adapt
- If you do not want pockets, continue repeating row 2 up to 53 (53, 52, 54, 56, 56, 57, 57, 57).
- Also, if you want a longer cardigan than stated for your size, add more repeats of row 2 at this point.
- For deeper pockets, add more rows before creating the pockets.
Pockets
- Place the cardigan with your working yarn on the right and the end from your starting chain on the left (see picture below).
- Place a sm in the 10th and 24 (25, 26, 27, 28, 29, 30, 31, 32 )th stitch from the edge. Repeat on the other side.
- Place a sm in the 10th and 24 (25, 26, 27, 28, 29, 30, 31, 32) th stitch from the edge on each side on row 8 (see picture 1).
- The sm will be referred to as 1st, 2nd, 3rd and 4th counting from right to left, they exist on two levels row 8 and row 20 (25) (therefore 1, 1, 2, 2, 3, 3, 4, 4).

- Leave a tail of 30 cm / 11.8”, this will be used later to sew the sides of the pockets.
- Attach your yarn with a slip knot in the top of the st with 1st sm from the edge (on row 8), Ch 2. Esc in the same stitch. Esc across row, ending in the st with the 2nd sm. Ch 2. Turn. 15 (16, 17, 18, 19, 20, 21, 22, 23) sts
- Esc across row. Ch 2. Turn (15 (16, 17, 18, 19, 20, 21, 22, 23) sts
- Repeat rows of esc until your pocket height reaches the top of row 20 (25) of your body piece, that will be 11 (16) rows.
- Fasten off and leave a 30 cm / 11.8” tail to sew the side of the pocket.
- Repeat on the other side, attaching your yarn in the 3rd sm and ending the row in the 4th.


Body: Continue
- Row 21 (26 for sizes XL-5XL): 9 esc, esc in the 1st esc of the pocket, esc across pocket, esc in st after the 2nd sm on the body, continue with esc across row until 3rd sm. esc in the 1st esc of the pocket, esc across pocket. Esc in the st 4th sm, continue with esc across row.
- Ch 2. Turn. 118 (129, 140, 151, 162, 170, 184, 195, 206) sts


Sewing the sides of the pockets
- Use the tails you left before attaching the yarn and after fastening off to sew the sides of the pockets.


Body: Continue
- Row 22 – 53 (53, 52, 54, 56, 56, 57, 57, 57) *: Esc back across row you just worked. Ch 2. Turn. Do not fasten off after last row. To make it easier to handle the body piece, sew the sides of the pockets on the wrong side of the garment to close them already on row 23 (28) (instructions below). 118 (129, 140, 151, 162, 170, 184, 195, 206) sts. Do not fasten off. Continue with front section 1.
Deciding on sleeve width
- How many rows you will make here depends on the width you want on your sleeve.
- The sleeves have a recommended width for each size in the size guide, but since the sleeves are wide and stretchy already from the beginning, it is best to match the sleeve as close to your own measurements as possible.
Measuring For the Sleeves
- Measure the width of your arm at its widest. Since the gauge for the sleeves is 1 cm per row you can use the number of centimetres as the number of rows you need to crochet for the sleeves.
- The pattern gives a suggestion on the width of the sleeves as follows: 30, 32, 34, 36, 38, 40, 42, 44, 46, 48, 50, 52 cm / 11.8, 12.6, 13.4, 14.2, 15, 15.7, 16.5, 17.3, 18.1, 18.9, 19.7, 20.5″ wide (more options than sizes).
Want Smaller Sleeves?
- If you go for a smaller width than the recommended for your size, add one more row of esc across for every 2 cm / 0.5″ less width of sleeve.
- Place out 4 sm to start making the front pieces and back piece.
- Place a sm in the 32 (34, 36, 38, 39, 40, 44, 47, 50)th st and one in the 36 (38, 42, 44, 47, 48, 52, 55, 58)th st from the edge. Repeat from the other edge.

Front section 1
- Row 1: Continue from where you ended on row 53 (53, 52, 54, 56, 56, 57, 57, 57). Esc across row until the 1st sm, ending in the st before the sm. Ch 2. Turn. 31 (33, 35, 37, 38, 39, 43, 46, 49) sts
- Row 2: Esc across row. Ch 2. Turn. 31 (33, 35, 37, 38, 39, 43, 46, 49) sts
- Row 3 – Repeat row 2 until your front section measures half of the width of your decided sleeve width i.e. 15, 16, 17, 18, 19, 20, 21, 22, 23, 24, 25, 26 cm / 5.9, 6.3, 6.7, 7.1, 7.5, 7.9, 8.3, 8.7, 9.1, 9.4, 9.8, 10.2″ high. Write down how many rows you made. Fasten off and leave a long tail for sewing the shoulders.
Back section
- Row 1: Attach your yarn with a sl knot in the st after the 2nd sm after your 1st front section. Ch 2, esc in the same st. esc across row until the st before the 3rd sm. Ch 2. Turn. 46 (53, 57, 63, 68, 74, 80, 85, 90) sts
- Row 2: Esc across row. Ch 2. Turn. 46 (53, 56, 63, 68, 74, 80, 85, 90) sts
- Row 3: Repeat row 2 for as many rows as you did on front section 1.
- Fasten off and leave a long tail for sewing the shoulders.
Front Section 2
- Row 1: Attach your yarn with a sl knot in the st after the 4th sm (after your back section) Esc across row. Ch 2. Turn. 31 (33, 35, 37, 38, 39, 43, 46, 49) sts
- Row 2: Esc across row. Ch 2. Turn. 31 (33, 35, 37, 38, 39, 43, 46, 49) sts
- Row 3: Repeat row 2 for as many rows as you did on front section 1. Fasten off and leave a long tail for sewing the shoulders.
Sew the Shoulders
- Front section 1 and 2 as well as back section are ready. Fold the front section over the back piece and sew the shoulders. Do not sew all the way. Leave an opening for the neck.
- Measure on your back piece so that you leave around 18-28 cm / 7.1- 11” in the middle as a neck opening.
- Sew the shoulders using the mattress stitch using the tails you left from front and back sections. You will not need all three tails, fasten off the one you do not use (depends on what side the tail is on, which depends on what sleeve circumference you decided on). It is sewn with right side of the garment facing out.
- It is done like lacing a shoelace. Go under the back loop of the other side, pull tight. Cross over to the other side, going under the back loop. Repeat across.


Border of the Body/Neckline

- Attach the yarn in the back of the neckline with a slip knot (right side facing out). Ch 1.
- Row 1: Place one sc in every sts around the edges of the cardigan. Around 1-2 sc per row. Space them out as sc2tog in the inside corners of the neckline. Make 3 sc in the outer corners of the cardigan. Continue spacing out all the way around. Join to the first sc of the round with a sl st. Ch 1. Turn.
- Row 2: sl st blo around. Join to the first sl st of the round with a sl st. Fasten off.
Sleeves: Make 2
- Begin with checking the gauge for the sleeves. Gauge for sleeves: 15 hdc-blo across, 10 rows. Change hook size if needed.
- The sleeves are worked from the side, meaning the width will be the length. That means you will have to decide on sleeve length already from the beginning.
- Below instructions assume a sleeve length of 47 cm / 18.5” which is usually a good sleeves length for many.
Before You Attach Sleeves
- Try on your cardigan and measure from the shoulder and from under the arms and take the measurement between these two as a good sleeve length. For example, from the shoulder to my hand I have 53 cm / 20.9” and from under my arms 44 cm / 17.3”, 47 cm / 18.5” is between these two.
- Attach your first sleeve to the cardigan before you make the second and try on. This way you’ll know a good sleeve length for you.
- You can also hold up the sleeve after a few rows and already then get a view on the final length.
- To adjust the sleeve length, add or remove chains. For every 2 cm add / remove 3 chains, for every 0.5” almost 2 ch.

- Ch 70
- Row 1: hdc-blo in the 3rd stitch from the hook. Hdc-blo across row. Ch 2. Turn. 68 sts
- Row 2: 29, 31, 33, 35, 36, 37, 39, 41, 43, 45, 47, 49, 51*: hdc-blo across row. Ch 2. Turn. 68 sts
*the number of rows here depend on the width you decided to have on your sleeve. If you want it 30 cm / 11.8″ around, then make 29 rows (i.e. always one row less than your cm width). The seam and the stretch of the stitch will add the final cm / 0.5″.
- Fold the sleeve in half, lengthwise. Sew it from bottom up, leaving an opening at the top, as wide as the width on your body section where you attach sleeve (see picture).
Attaching the sleeves to the cardigan


- Fold the sleeves in half long ways.
- Sew the side using the mattress stitch as you did for the shoulders.
- Leave a bit of the unsewn before the edge (same amount as your cardigan stands out on the side where you attach sleeves, see pictures).
- Sew your sleeve to the cardigan using the mattress stitch.
- Fasten off and sew in your ends.

Crochet Patterns to Try Next
If you love crochet wearables, check out these size inclusive designs also available on the blog:


Let’s Stay Connected!
I always love to see your makes so if you try any of my patterns or follow my stitch tutorials please tag me @bellacococrochet or use the #bellacococrochet


Love the look of this sweater but this pattern is so hard to understand. I’ve been crocheting for years and I don’t understand a lot of this. Each size needs to be it’s own pattern and written better. I only hope Bella Coco does a video because sadly I cannot follow this
I’ve found that I need more room for the sleeves (fat arms). Unfortunately, I’m at the point of making sleeves. Is there anyway to do this beside frogging the thing?