This post contains affiliate links. Click to see full details of my Privacy Policy.
The Circle Of Hope Blanket pattern is here! I have loved working on this project. If this is your first time seeing this, let me catch you up on the story behind this beautiful rainbow crochet blanket.
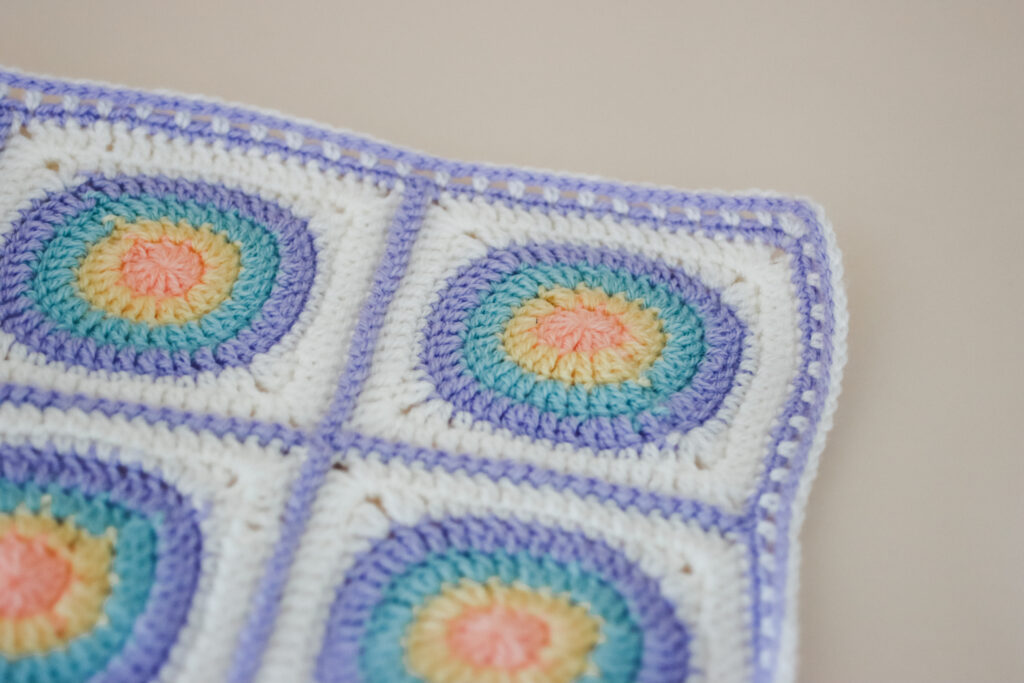
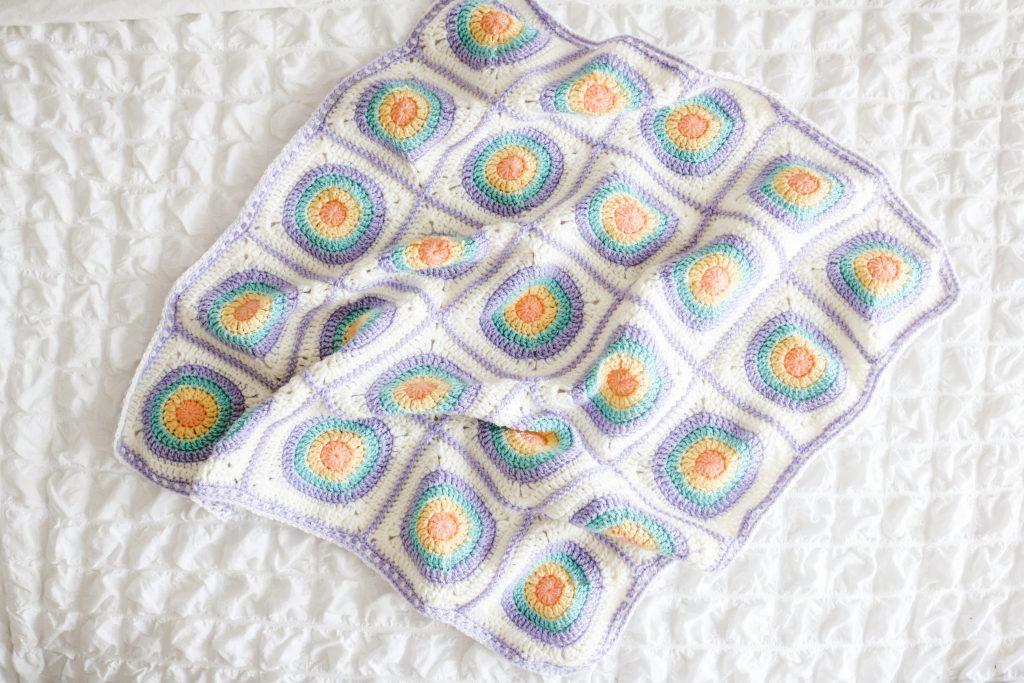
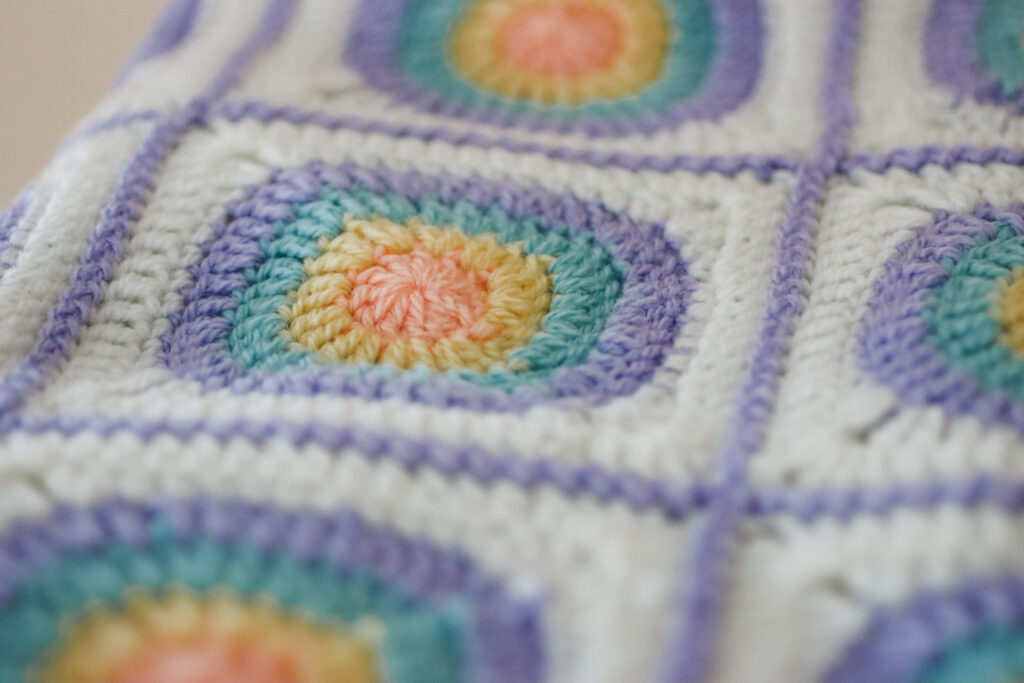
Rainbows are an ever popular symbol of hope in the world’s current climate, so I took inspiration from that and also the amazing crochet community (symbolised by the circle) to create this vivid and vibrant rainbow crochet blanket. This stunning granny square blanket is a beginner friendly crochet pattern and will look amazing now matter what colours you choose!
I chose to take inspiration from a pastel rainbow (of course!) and I just adore how it’s turned out.
Ready to hook up your own rainbow – let’s go!
pin for later
Materials and tools
- Yarn: Paintbox Simply DK in Peach Orange [154] (Colour A), Daffodil Yellow [121] (Colour B), Washed Teal [132] (Colour C), Pale Lilac [145] (Colour D), Champagne White [102] (Colour E) You will need 1 ball of A, B, C & D and 2 balls of E
- Hook: 4mm, UK 8, US G/6
- Stitch markers (optional)
- Scissors
- Darning needle

You can pick up the low cost ad-free PDF pattern HERE. The 7-page PDF contains extra sizing, diagram and charts to help you with your project.
Completed Size
The FREE baby blanket pattern measures approximately 26 x 26 inches.
Toddler – 41 x 46 inches
Small Throw – 51 x 61 inches
Large Throw – 61 x 71 inches
If you LOVE crochet blankets, there’s PLENTY for you to love here. Just click the picture to browse my ENTIRE collection of blankets.
Gauge
Each square should measure
5 inches x 5 inches approx.
pattern Notes
Pattern written in UK terms.
This rainbow crochet blanket pattern will require you to make all of your squares before you join them together.
I advise you to block your squares if needed to ensure they are all of equal size before joining.
Use stitch markers to join corners of squares when joining if needed.
Terms and Abbreviations
Slip Stitch(s): ss(s): Insert hook, yarn over pull through stitch and loop on hook
Chain(s): ch(s): Yarn over, pull through
Double Crochet(s): dc(s): Insert hook into stitch, yarn over, pull up a loop, you will have two loops on the hook. Yarn over, pull through remaining two loops.
Half Treble Crochet(s): htr(s): Yarn over, insert into stitch, yarn over, pull up a loop, you will have three loops on the hook. Yarn over, pull through all three loops.
Treble Crochet(s): tr(s): Yarn over, insert into stitch, yarn over, pull up a loop, you will have three loops on the hook. Yarn over, pull through two loops, yarn over, pull through remaining two loops.
Unsure of the differences between UK and US terms? Need a refresher on how to do your stitches? In my ‘How to crochet: A handy reference guide’ EBook I help you with all of these terms and you can always have them to hand! You will also get exclusive access to free video instructions. Learn more about the eBook here.
CIRCLE OF HOPE RAINBOW CROCHET BLANKET PATTERN
Squares
Make magic circle with Colour A
Round 1: Ch 3 (counts as stitch here and throughout) 11tr in magic circle. Join with a ss into top of beginning ch-3 changing to Colour B. Tie off Colour A. (12 sts)
Round 2: Ch 3, tr in same st. Work 2 tr in each st all the way around. Join with a ss into top of beginning ch-3 changing to Colour C. Tie off Colour B. (24 sts)
Round 3: Ch 3, tr in same st. Tr in next st. *2 tr, tr in next st; repeat from * around. Join with a ss changing to Colour D. Tie off Colour C. (36 sts)
Round 4: Ch 3, tr in same st. Tr in next 2 st. *2 tr, tr in next 2 st; repeat from * around. Join with a ss changing to Colour E. Tie off Colour D. (48 sts)
Round 5: Ch 3, tr in same st. *Ch 1, 2 tr in next st, htr, dc in next 8 sts, htr, 2tr in next st; repeat from * around omiting last 2 tr on final side, ss to beginning ch-3. Do not tie off.
Round 6: Ch 3, tr in next st. *(2tr, ch 2, 2tr) in ch-1 sp from previous round. 1 tr in next 14 sts; repeat from * two times. (2tr, ch 2, 2tr) in ch-1 sp from previous round. 1 tr in remaining 12sts.
Tie off and sew in ends.
Joining
With right sides facing up join colour D in 2nd chain of top right corner of Square A.
Inserting the hook from right side to wrong side, ss into the corresponding chain of Square B.
You will continue to ss into the next unused st on Square A, then ss into the next unused st of Square B. Each st on the side of each square will be used as you alternate from Square A to Square B.
From here, pick up a further 2 squares and continue in the same manor until you have join all of the squares in that row.
You will join all of the squares in the rows first and then join the columns. The photos below will show you how to work over the existing corners.
- Work the stitch as normal
- Pull the yarn through under the join
- Work the stitch over the join
- Work the stitch as normal


Border
Row 1: With colour D, join with ss in any corner sp. *(Dc, ch 2, dc) in corner space. Dc in each st and each join across. Repeat from * three times. Tie off.
Row 2: With colour E, join with ss in any corner sp. Ch 4, htr in corner sp. Ch 1, skip a st. *(htr, ch 1, skip a st) across to the next corner sp. (htr, ch 2, htr) in corner. Repeat from * three times. Tie off.

NOTE: BE CAREFUL WHEN WORKING THE SURFACE SLIP STITCH, IF YOUR TENSION IS TOO TIGHT, IT CAN CAUSE CURLING. YOU MAY WISH TO GO UP A HOOK SIZE TO PREVENT THIS.
Row 3: With colour D, join with a ss around the post of first stitch of any corner. Surface ss around each st across and in both chs of the corner. Repeat all the way around work. Tie off.
Congratulations! You’re all done!
I always love to see your makes so if you try any of my patterns or follow my stitch tutorials please tag me @bellacococrochet or use the #bellacococrochet
Tutorial Links
Squares
Join



9 Comments
Stephanie
June 17, 2020 at 9:06 pmHi there! In the border, I think you meant to say color E for row two… I just worked around with the colored yarn I’m using and realized those stitches should be white
BellaCocoTeam
June 18, 2020 at 12:36 pmHi Stephanie, thank you for bringing this to may attention, that has now been updated 🙂
Jackie Piazza
June 19, 2020 at 12:45 amThank you
BellaCocoTeam
June 23, 2020 at 12:04 pmYou are very welcome 🙂
Hanna
June 30, 2020 at 6:26 pmHello!
Thank you for the nice pattern!
Just wondering about the amount for E- colour biggest size at lovecraft is said to be 6 skeins, your mail said 8 😉
I also wonder if there should be a link to buy the pattern from your website….. “The following sizes can be found in the ad-free PDF, printable pattern that can be found on my website HERE or on LoveCrafts HERE.” as only Lovecraft is a link at the moment.
Best Regards!
BellaCocoTeam
July 2, 2020 at 8:28 amIt is only available on Lovecrafts at the moment so I would be guided by what they say 🙂
Steph
March 20, 2021 at 9:39 pmHi! I’m giving this a go now, and I feel as though the picture of your squares look different between rounds 5 & 6 vs what mine look like; almost as if your round 6 is “higher” than round 5, if that makes sense.
I played around a bit with making round 6 in the BLO, and I’m the FLO, but neither seemed to produce the same effect.
Am I just imagining it all together? 🙂 Or is there an additional step that would make the difference?
Thank you!!
Erin
March 16, 2022 at 8:04 pmThank you for this pattern! I’m looking forwards to making!
BellaCocoTeam
March 16, 2022 at 8:08 pmYou are very welcome 🙂